
Introduction
Adding intelligence to your iOS app doesn’t have to be complicated. This tutorial covers a straightforward Core ML integration, showing how to load and run a pre-trained ML model in just a few simple steps. You don’t need a PhD in machine learning to make your app smarter. You just need the right foundation and a clear process.
What is Core ML (And Why Should You Care?)
The “What”: Core ML in the Apple Ecosystem
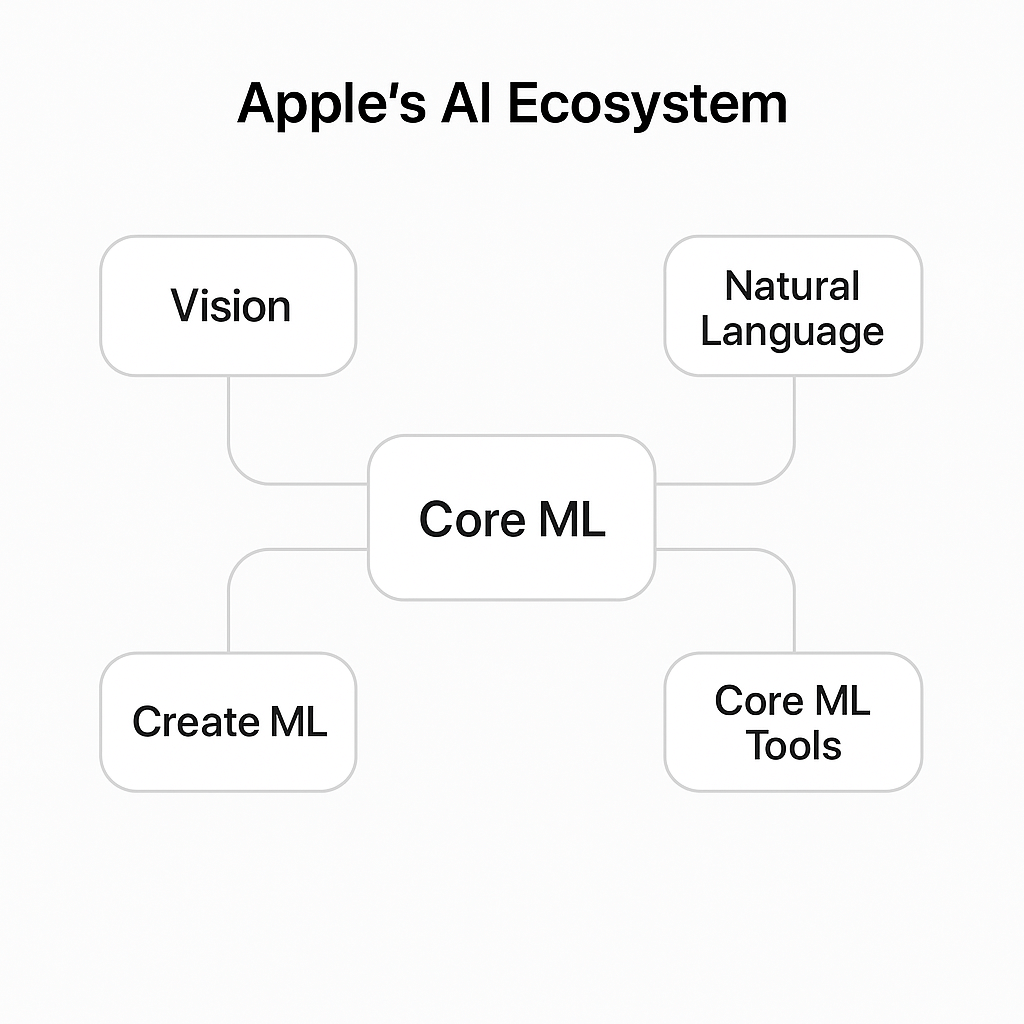
Core ML is Apple’s on-device framework for running machine learning models directly on iOS, macOS, watchOS, and tvOS devices. It powers many intelligent features you already use every day—photo recognition, text predictions, and Siri’s voice understanding. The framework sits at the heart of what Apple calls “Apple Intelligence,” their broader initiative to bring AI capabilities to their platforms while maintaining their privacy-first approach.
The framework handles the heavy lifting of model optimization and execution. When you add an ML model to your Xcode project, Core ML automatically generates Swift code that makes the model easy to use. You don’t need to understand neural network architectures or tensor operations. You just call Swift methods with your input data and get predictions back.
What makes Core ML particularly valuable is how it bridges the gap between complex machine learning and everyday iOS development. You can take a pre-trained model from anywhere—Apple’s Model Gallery, Hugging Face, or a custom model you’ve trained—and integrate it with minimal friction. The framework supports various model types including neural networks, tree ensembles, support vector machines, and generalized linear models.
The “Why”: Benefits of On-Device ML
Why run machine learning on-device when cloud-based solutions exist? Here’s what matters:
Privacy: User data stays on the device. When you classify a photo or analyze text, that information never leaves the user’s iPhone. This isn’t just good for privacy compliance—it builds user trust. Apple has built their entire platform around this principle, and Core ML makes it easy for your app to follow the same standard.
Speed: No network latency. Predictions happen in milliseconds, not seconds. Your app feels responsive because there’s no waiting for server round-trips. Users get instant feedback, which dramatically improves the experience for real-time features like camera filters or live text recognition.
Offline Access: The app works without an internet connection. Your ML features function on airplanes, in rural areas, or anywhere else connectivity is limited. This reliability is something cloud-based solutions simply can’t match.
Cost: No server costs for inference. You’re not paying for GPU time on cloud servers every time a user makes a prediction. As your app scales to thousands or millions of users, this becomes a significant advantage.
Let’s get into the actual integration process.
Setting Up Your Project for Core ML Integration
Step 1: Find and Add an ML Model
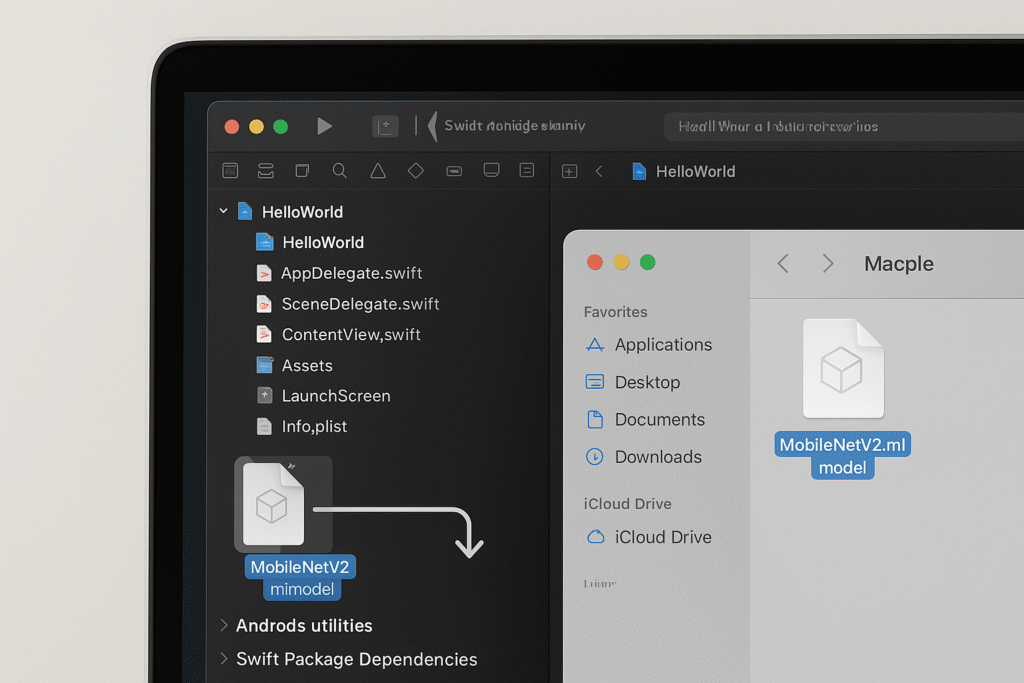
An .mlmodel file is Core ML’s packaged format for machine learning models. Think of it as a compiled, optimized version of a model that iOS can run efficiently. Inside this file is everything Core ML needs: the model architecture, trained weights, input/output specifications, and metadata.
Finding a model is straightforward. Apple maintains an ML Model Gallery with ready-to-use models for common tasks like image classification, object detection, and style transfer. You can also find thousands of models on Hugging Face—just look for ones that explicitly support Core ML, or use Apple’s Core ML Tools library to convert models from TensorFlow or PyTorch formats.
For this tutorial, let’s use a simple image classifier like MobileNetV2. Once you’ve downloaded your .mlmodel file, drag it into your Xcode project navigator. Xcode will ask if you want to copy the file—choose yes. That’s it. Xcode immediately recognizes the file type and starts generating Swift code for you automatically.
Step 2: Inspect the Model in Xcode

Here’s something I learned late in my career: always inspect your model before writing code. Xcode auto-generates a Swift class for your model, complete with type-safe methods and properties. But you need to understand what the model expects and what it returns.
Click on the .mlmodel file in your project navigator. Xcode opens a detailed inspector showing three key sections:
Model Class shows the Swift class name Xcode generated—this is what you’ll instantiate in your code.
Inputs is critical. You’ll see the exact type required (commonly CVPixelBuffer for images, but could be MLMultiArray for other data types) and the expected dimensions. For an image classifier, you might see image of type CVPixelBuffer with dimensions 224 x 224 x 3.
Outputs tells you what you’ll get back. For a classifier, you typically see classLabel (a String with the predicted class name) and classLabelProbs (a Dictionary mapping class names to confidence scores).
This inspection step takes 30 seconds but saves you from runtime errors caused by type mismatches. Now you’re ready to write the integration code.
The Core ML Integration: Writing the Code
Step 3: Load Your Model
Loading your model is surprisingly simple. Xcode’s auto-generated class makes this a one-liner. The class name matches your .mlmodel filename—if your file is called MobileNetV2.mlmodel, the class is MobileNetV2.
let model = try? MobileNetV2()That’s it. This instantiates the model and loads it into memory, ready for predictions. I’m using try? here for simplicity, which returns an optional. In production code, you’d want proper error handling with a do-catch block to inform users if the model fails to load.
// Better error handling for production
do {
    let model = try MobileNetV2()
    self.classifier = model
} catch {
    Logger().error("Failed to load ML model: \(error.localizedDescription)")
    // Handle error appropriately
}
One important note: Core ML handles model optimization automatically. The first time you run your app on a device, Core ML may compile the model for that specific hardware. This compilation is cached, so subsequent launches are faster. On newer devices with Neural Engine chips, Core ML automatically uses that hardware for acceleration. You don’t configure any of this—it just works.
Step 4: Prepare Your Input Data
This is often the trickiest part of Core ML integration. Your model expects data in a specific format, and converting your app’s data to that format requires some boilerplate code.
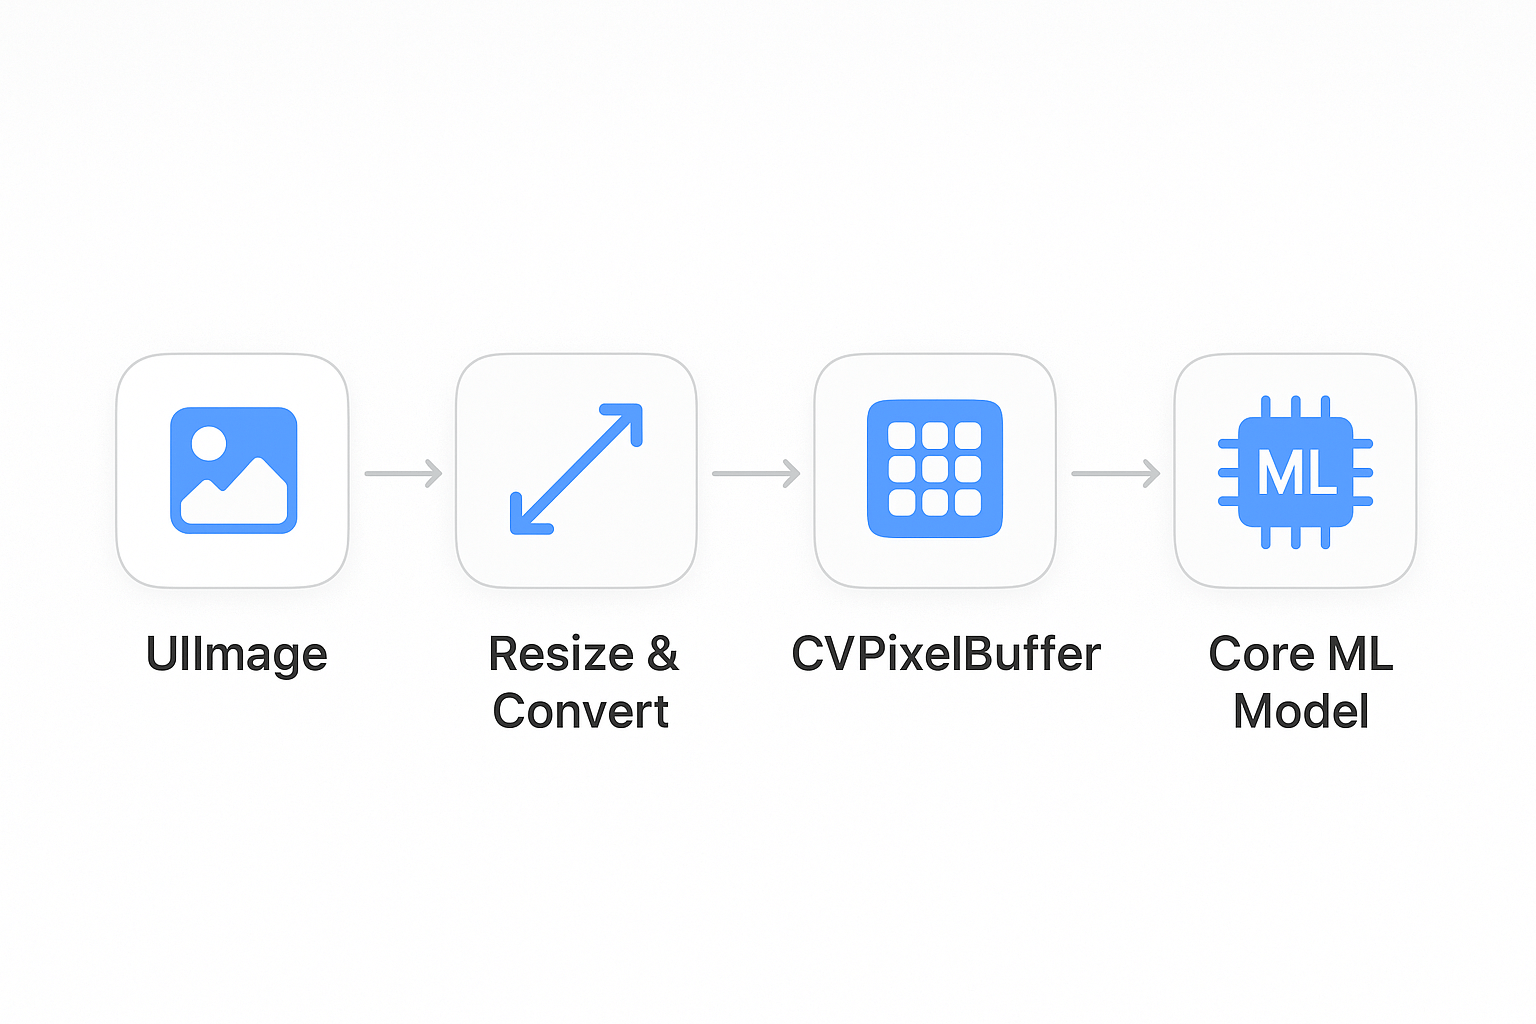
For image classifiers, the model typically expects a CVPixelBuffer—a low-level image buffer format used by Core Video. But your app probably works with UIImage or SwiftUI’s Image type. You need a bridge between these.
Here’s a helper function that handles this conversion. I keep this as a reusable utility since you’ll need it for any image-based ML model:
func createPixelBuffer(from image: UIImage, size: CGSize) -> CVPixelBuffer? {
    let width = Int(size.width)
    let height = Int(size.height)

    let attributes: [String: Any] = [
        kCVPixelBufferCGImageCompatibilityKey as String: true,
        kCVPixelBufferCGBitmapContextCompatibilityKey as String: true
    ]

    var pixelBuffer: CVPixelBuffer?
    let status = CVPixelBufferCreate(
        kCFAllocatorDefault,
        width,
        height,
        kCVPixelFormatType_32ARGB,
        attributes as CFDictionary,
        &pixelBuffer
    )

    guard status == kCVReturnSuccess, let buffer = pixelBuffer else {
        return nil
    }

    CVPixelBufferLockBaseAddress(buffer, [])
    defer { CVPixelBufferUnlockBaseAddress(buffer, []) }

    let context = CGContext(
        data: CVPixelBufferGetBaseAddress(buffer),
        width: width,
        height: height,
        bitsPerComponent: 8,
        bytesPerRow: CVPixelBufferGetBytesPerRow(buffer),
        space: CGColorSpaceCreateDeviceRGB(),
        bitmapInfo: CGImageAlphaInfo.noneSkipFirst.rawValue
    )

    guard let cgImage = image.cgImage, let ctx = context else {
        return nil
    }

    ctx.draw(cgImage, in: CGRect(x: 0, y: 0, width: width, height: height))
    return buffer
}
The key steps: get the CGImage from UIImage, create a pixel buffer with the right size and format, then render the image into that buffer using Core Graphics.
Step 5: Run the Prediction
Running a prediction is straightforward once you have your input prepared. You call the model’s prediction() method with your input data. Core ML handles the actual inference—running the data through the neural network layers and computing the result.
Always wrap prediction calls in a do-catch block. Predictions can fail for several reasons: input data might not match expected dimensions, the model might encounter numerical issues, or the device might run out of memory (rare, but possible).
do {
    guard let pixelBuffer = createPixelBuffer(from: selectedImage, size: CGSize(width: 224, height: 224)) else {
        Logger().error("Failed to create pixel buffer")
        return
    }

    let prediction = try model.prediction(image: pixelBuffer)
    let classLabel = prediction.classLabel
    let confidence = prediction.classLabelProbs[classLabel] ?? 0.0

    Logger().info("Prediction: \(classLabel) with confidence: \(confidence)")

} catch {
    Logger().error("Prediction failed: \(error.localizedDescription)")
}
The prediction happens synchronously on the calling thread. For most models, predictions are fast (tens to hundreds of milliseconds), but you still need to be careful about where you call this code. We’ll address threading in the best practices section.
Step 6: Read and Use the Output
Accessing the model’s output is type-safe thanks to Xcode’s generated code. For a classifier, you typically get two things: classLabel (the predicted class as a String) and classLabelProbs (a Dictionary mapping each possible class to its confidence score).
In a SwiftUI app, you’ll usually update a @State or @Published property with the result, which triggers a UI update. The pattern is simple: run the prediction, extract the result, update your state. SwiftUI’s reactive nature handles the rest.
Let’s see how this all comes together in a complete example.
A Practical Example: Simple SwiftUI Image Classifier
Building the UI
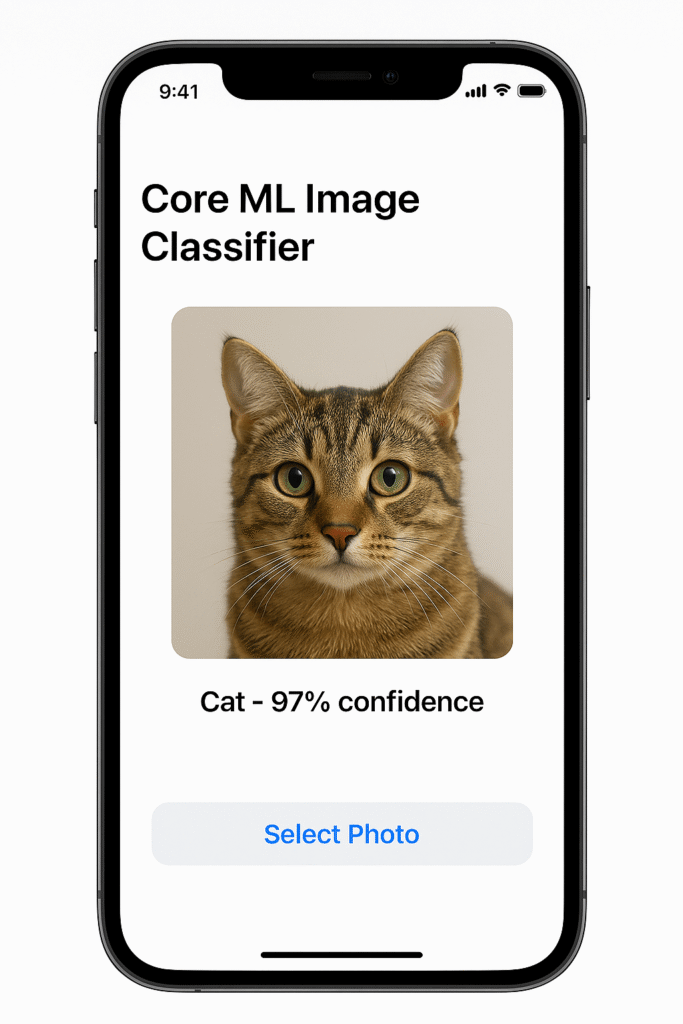
Let’s build a complete, working image classifier in SwiftUI. The UI needs just three elements: a button to select a photo, an image view to show the selected photo, and a text view to display the prediction result. We’ll use PhotosPicker from PhotosUI, which gives us a native photo selection experience.
import SwiftUI
import PhotosUI

struct ImageClassifierView: View {
    @StateObject private var viewModel = ImageClassifierViewModel()
    @State private var selectedItem: PhotosPickerItem?
    @State private var selectedImage: UIImage?

    var body: some View {
        VStack(spacing: 20) {
            Text("Core ML Image Classifier")
                .font(.title)
                .fontWeight(.bold)

            if let image = selectedImage {
                Image(uiImage: image)
                    .resizable()
                    .scaledToFit()
                    .frame(maxWidth: 300, maxHeight: 300)
                    .cornerRadius(12)
            } else {
                RoundedRectangle(cornerRadius: 12)
                    .fill(Color.gray.opacity(0.2))
                    .frame(width: 300, height: 300)
                    .overlay(
                        Text("Select a photo")
                            .foregroundColor(.gray)
                    )
            }

            PhotosPicker(selection: $selectedItem, matching: .images) {
                Label("Select Photo", systemImage: "photo")
                    .font(.headline)
                    .foregroundColor(.white)
                    .padding()
                    .background(Color.blue)
                    .cornerRadius(10)
            }

            VStack(spacing: 8) {
                Text(viewModel.predictionResult)
                    .font(.title2)
                    .fontWeight(.semibold)

                if viewModel.confidence > 0 {
                    Text("Confidence: \(Int(viewModel.confidence * 100))%")
                        .font(.subheadline)
                        .foregroundColor(.secondary)
                }
            }
            .padding()

            Spacer()
        }
        .padding()
        .onChange(of: selectedItem) { _, newItem in
            Task {
                if let data = try? await newItem?.loadTransferable(type: Data.self),
                   let image = UIImage(data: data) {
                    selectedImage = image
                    await viewModel.classify(image: image)
                }
            }
        }
    }
}
This ObservableObject pattern is a clean way to separate logic from the view, tapping directly into SwiftUI’s reactive data flow to update the UI. This UI follows Apple’s Human Interface Guidelines with clear visual hierarchy and intuitive interactions. The prediction result displays prominently, and we show confidence as a percentage to give users context about the prediction quality.
Connecting the Logic
Now let’s look at the view model that ties everything together. This class handles model loading, image processing, prediction execution, and state management:
import UIKit
import CoreML
import os
@MainActor
class ImageClassifierViewModel: ObservableObject {
@Published var predictionResult: String = "Select a photo to classify"
@Published var confidence: Double = 0.0
private var model: MobileNetV2?
private let logger = Logger(subsystem: "com.yourapp.coreml", category: "ImageClassifier")
init() {
loadModel()
}
private func loadModel() {
do {
model = try MobileNetV2()
logger.info("Model loaded successfully")
} catch {
logger.error("Failed to load model: \(error.localizedDescription)")
predictionResult = "Failed to load ML model"
}
}
func classify(image: UIImage) async {
guard let model = model else {
predictionResult = "Model not available"
return
}
predictionResult = "Analyzing..."
confidence = 0.0
// ML work on background thread, UI updates on main actor
let result = await Task.detached {
return self.performClassification(image: image, model: model)
}.value
if let (label, conf) = result {
predictionResult = label
confidence = conf
logger.info("Classification complete: \(label) (\(conf))")
} else {
predictionResult = "Classification failed"
confidence = 0.0
}
}
private func performClassification(image: UIImage, model: MobileNetV2) -> (String, Double)? {
guard let pixelBuffer = createPixelBuffer(from: image, size: CGSize(width: 224, height: 224)) else {
logger.error("Failed to create pixel buffer")
return nil
}
do {
let prediction = try model.prediction(image: pixelBuffer)
let label = prediction.classLabel
let conf = prediction.classLabelProbs[label] ?? 0.0
return (label, conf)
} catch {
logger.error("Prediction error: \(error.localizedDescription)")
return nil
}
}
private func createPixelBuffer(from image: UIImage, size: CGSize) -> CVPixelBuffer? {
let width = Int(size.width)
let height = Int(size.height)
let attributes: [String: Any] = [
kCVPixelBufferCGImageCompatibilityKey as String: true,
kCVPixelBufferCGBitmapContextCompatibilityKey as String: true
]
var pixelBuffer: CVPixelBuffer?
let status = CVPixelBufferCreate(
kCFAllocatorDefault,
width,
height,
kCVPixelFormatType_32ARGB,
attributes as CFDictionary,
&pixelBuffer
)
guard status == kCVReturnSuccess, let buffer = pixelBuffer else {
return nil
}
CVPixelBufferLockBaseAddress(buffer, [])
defer { CVPixelBufferUnlockBaseAddress(buffer, []) }
let context = CGContext(
data: CVPixelBufferGetBaseAddress(buffer),
width: width,
height: height,
bitsPerComponent: 8,
bytesPerRow: CVPixelBufferGetBytesPerRow(buffer),
space: CGColorSpaceCreateDeviceRGB(),
bitmapInfo: CGImageAlphaInfo.noneSkipFirst.rawValue
)
guard let cgImage = image.cgImage, let ctx = context else {
return nil
}
ctx.draw(cgImage, in: CGRect(x: 0, y: 0, width: width, height: height))
return buffer
}
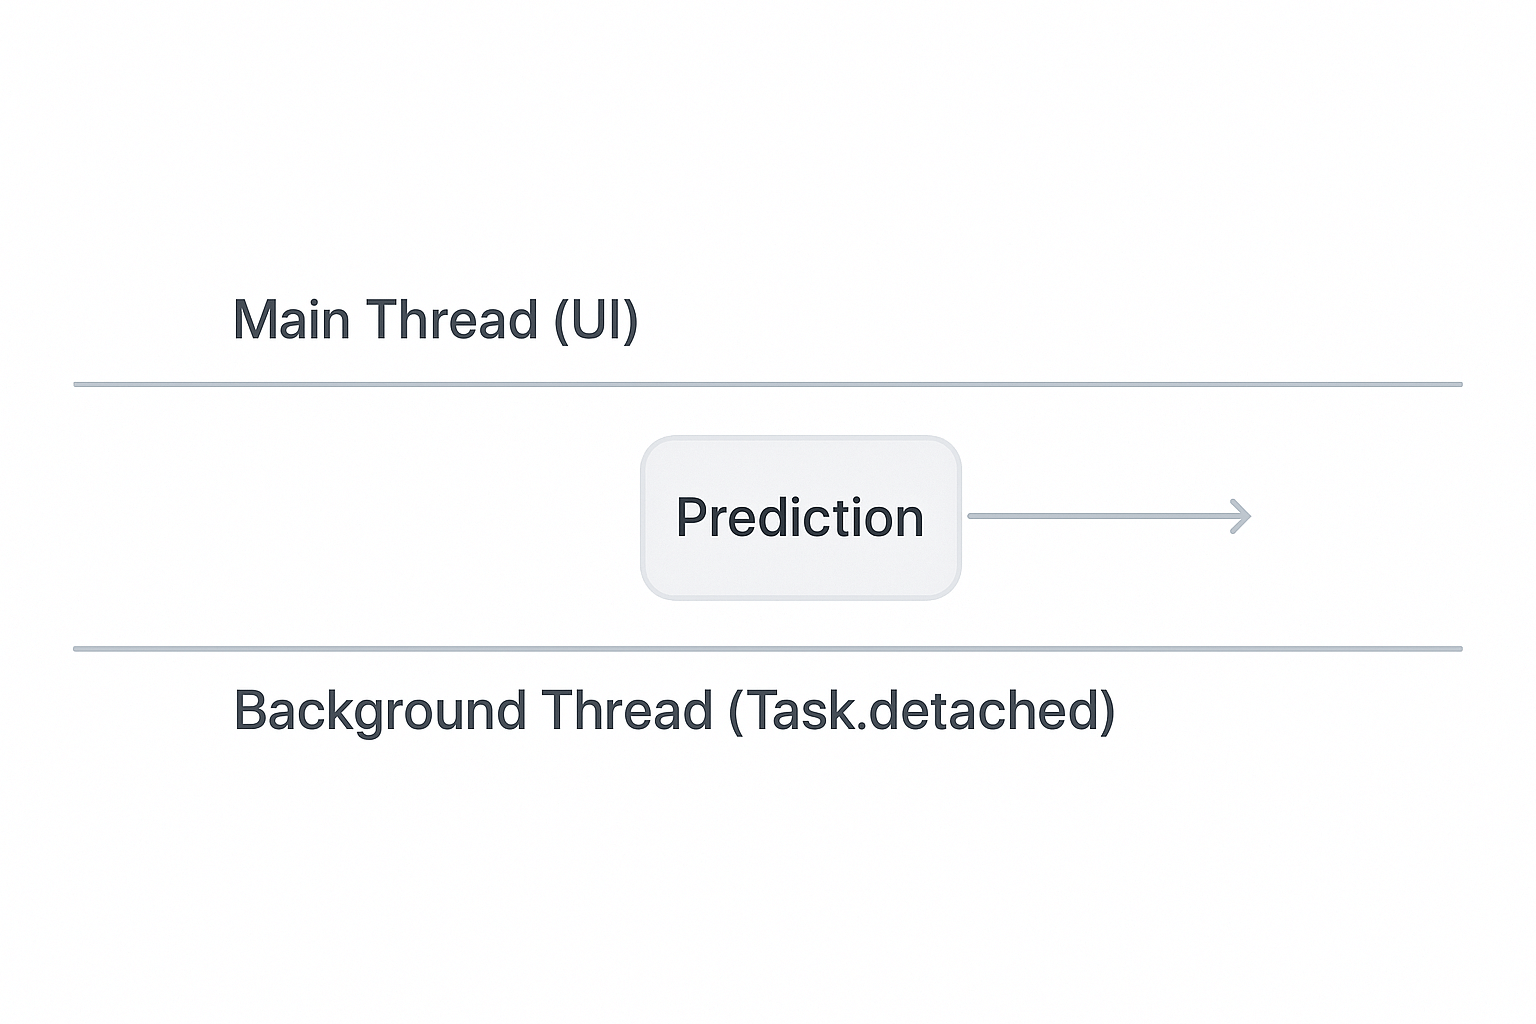
}Notice several important patterns here. First, we use Logger instead of print statements—this is the modern, recommended approach for iOS logging. Second, the actual ML work happens on a background thread via Task.detached, keeping the main thread responsive. Third, we use async/await for clean asynchronous code. Fourth, we provide user feedback during processing with the “Analyzing…” state.
These small details make the difference between a demo and production-ready code.
Best Practices and Final Thoughts
Don’t Block the Main Thread
This is critical. Core ML predictions are computationally intensive. Even a “fast” model might take 50-100 milliseconds on an older device. That’s enough to cause visible UI stutter if you’re running predictions on the main thread.
The solution is straightforward: wrap your prediction logic in a Task and use Swift’s concurrency system to handle threading automatically. I’ve covered the fundamentals of async/await and Task in a previous guide. Use Task.detached for CPU-intensive work, then hop back to the main actor when you need to update UI.
For real-time predictions—like analyzing camera frames—this becomes even more important. You might need to throttle predictions to run only every few frames, or use a serial queue to ensure predictions don’t pile up. The principle remains the same: never block user interactions while waiting for ML predictions.
It’s Easier Than It Looks
I avoided Core ML integration for a long time early in my iOS career, thinking it required deep machine learning expertise. I was wrong. For using pre-trained models—which covers most use cases—the integration is surprisingly straightforward. Apple has done excellent work making ML accessible to regular iOS developers.
The real complexity isn’t in Core ML itself. It’s in choosing the right model for your needs and understanding what your model can and cannot do. A classifier trained on ImageNet knows about 1,000 everyday objects, but won’t recognize your app’s specific domain unless you fine-tune it. Managing user expectations around ML accuracy is more important than the technical integration.
The key insight: you don’t need to understand how the neural network works internally. You just need to understand inputs and outputs. Treat the ML model like any other API—know what it expects, what it returns, and what its limitations are.
Where to Go From Here

You now have the foundation for Core ML integration. Here’s what to explore next:
Vision Framework: If you’re working with images or video, the Vision framework makes Core ML integration even easier. Vision handles common preprocessing tasks automatically—face detection, image alignment, feature extraction—before passing data to your Core ML model. You can combine Vision and Core ML for powerful image analysis pipelines with less code.
Create ML: Apple’s Create ML app lets you train custom models without writing machine learning code. If you need a model trained on your specific data—like recognizing products in your inventory or classifying domain-specific images—Create ML provides a visual interface for training. The models export directly to .mlmodel format, ready for your app.
Core ML Converters: If you have a model trained in TensorFlow, PyTorch, or another framework, Apple’s Core ML Tools library converts them to Core ML format. This opens up the entire ecosystem of open-source models. You can take state-of-the-art models from research papers or model zoos and run them directly on iOS.
Conclusion
You’ve learned the complete Core ML integration workflow: adding a model to your project, inspecting its requirements, loading it in code, preparing input data, running predictions, and displaying results. You’ve seen a working SwiftUI example that brings all these pieces together. Most importantly, you’ve learned the best practices that separate demo code from production-ready implementations.
On-device machine learning is a powerful tool for building smarter, more responsive, privacy-focused iOS apps. You now have the fundamental building blocks to start using it in your own projects. The barrier to entry is lower than you might have thought—it’s not about machine learning expertise, it’s about understanding inputs and outputs.
Start with a simple pre-trained model, get comfortable with the workflow, then expand from there.
References
- Core ML – Apple Developer Documentation
- Integrating a Core ML Model into Your App – Apple Developer Documentation
- Core ML Model Format – Apple Developer Documentation
- Core ML Model Gallery – Apple Developer
- coremltools – Apple Developer Documentation
- CVPixelBuffer – Apple Developer Documentation
- MLMultiArray – Apple Developer Documentation
- Error Handling – The Swift Programming Language
- Optimizing Your Core ML Model’s Performance – Apple Developer Documentation
- Core Graphics – Apple Developer Documentation
- State and Data Flow – Apple Developer Documentation
- PhotosPicker – Apple Developer Documentation
- MainActor – Apple Developer Documentation
- Logger – Apple Developer Documentation
- Concurrency – The Swift Programming Language
- Vision Framework – Apple Developer Documentation
- Create ML – Apple Developer Documentation
