Apple has set April 28, 2026 as the hard deadline for all new app submissions and updates to be built with the iOS 26 SDK [Ref-1]. If you haven’t started your iOS 26 SDK migration yet, now is the time. This guide walks you through every key change – step by step – so your app stays on the App Store without surprises.
Why This iOS 26 SDK Migration Matters (and Why You Shouldn’t Wait)
Apple has enforced SDK upgrade deadlines for years. This one is no different – except the scope is significantly bigger.
iOS 26 isn’t just a version bump. It ships Apple’s most ambitious design overhaul since iOS 7: a translucent UI system called Liquid Glass, a new Foundation Models framework for on-device AI, and a unified versioning scheme across all Apple platforms. There’s a lot to absorb – which is exactly why starting early matters.
Any app uploaded to App Store Connect after April 28, 2026 – new submissions and updates alike – must be built with the iOS 26 SDK [Ref-1]. Miss the deadline and your submission gets rejected. Your existing app stays on the store, but you can’t ship any update until you’re compliant.
I’ve seen teams scramble through SDK migrations at the last minute. It’s stressful, it produces rushed code, and ultimately, users feel the difference. Start now. Give yourself room to test, fix, and ship with confidence.
Step 1 – Update to Xcode 26
Every iOS 26 migration starts in the same place: your toolchain. Building with the iOS 26 SDK requires Xcode 26 or later – no exceptions.
Download Xcode 26 from the Mac App Store or directly from the Apple Developer portal at developer.apple.com/xcode. Before installing, confirm your Mac is running macOS Tahoe 26 or later – Xcode 26 won’t install on anything older.
Once Xcode is updated, verify your installation from the terminal:
xcodebuild -version
# Expected output:
# Xcode 26.0
# Build version 26A...
CI/CD note: If you use Xcode Cloud, Bitrise, or GitHub Actions, update your build agents to Xcode 26 as well. A passing local build with a CI pipeline still running Xcode 16 will block your App Store submission – a frustrating way to discover the gap. If you want a deeper look at how to keep your Xcode Cloud pipelines production-ready, we’ve covered that in detail.
With Xcode 26 in place, you’re ready to open your project and start the actual migration work.
Step 2 – Review Deprecated APIs and Replacements
This is where most of the iOS 26 SDK migration work actually lives. Open your project in Xcode 26 and hit build. Don’t panic at the warnings that come up – treat them as your migration checklist. Each one is telling you exactly what to fix.
UIKit Deprecations
Let’s start with UIKit. Three areas need immediate attention:
UIWebView– fully removed [Ref-2]. Xcode 26 won’t compile it. Migrate toWKWebViewnow. This API has been deprecated since iOS 12, so if it’s still in your codebase, now is finally the moment to deal with it.UIScreen.main– deprecated. Switch towindowScene.screenfor screen property access.SceneKit– officially deprecated across all platforms in Xcode 26 [Ref-3]. The forward path isRealityKit[Ref-4]. If your app uses 3D rendering, plan for this one early – the migration takes real time.
Real-world scenario: You have a UIKit app with a UIWebView that renders rich content in a detail screen. It was added in iOS 9 and nobody has touched it since. Xcode 26 won’t just warn you – it’ll fail the build entirely. The fix is straightforward: swap in WKWebView [Ref-5], wire up WKNavigationDelegate, and test rendering on both iPhone and iPad.
// ❌ Before - will not compile in Xcode 26
let webView = UIWebView(frame: view.bounds)
webView.loadHTMLString(htmlContent, baseURL: nil)
view.addSubview(webView)

// ✅ After - WKWebView replacement
import WebKit

let webView = WKWebView(frame: view.bounds)
webView.navigationDelegate = self
webView.loadHTMLString(htmlContent, baseURL: nil)
view.addSubview(webView)
SwiftUI Changes and New Modifiers
SwiftUI has two deprecations that show up a lot in real codebases:
NavigationView– deprecated since iOS 16 [Ref-6], but it’s still everywhere. Migrate toNavigationStackfor single-column layouts orNavigationSplitViewfor sidebar/detail [Ref-7]. If you’ve been putting this off, iOS 26 is the forcing function.actionSheet– broken in iOS 26. Replace it withconfirmationDialog.
// ❌ Before - NavigationView (deprecated)
NavigationView {
    ContentView()
        .navigationTitle("Home")
}

// ✅ After - NavigationStack
NavigationStack {
    ContentView()
        .navigationTitle("Home")
}
// ❌ Before - actionSheet (broken in iOS 26)
.actionSheet(isPresented: $showSheet) {
    ActionSheet(title: Text("Options"), buttons: [
        .default(Text("Edit")),
        .destructive(Text("Delete")),
        .cancel()
    ])
}

// ✅ After - confirmationDialog
.confirmationDialog("Options", isPresented: $showSheet) {
    Button("Edit") { handleEdit() }
    Button("Delete", role: .destructive) { handleDelete() }
    Button("Cancel", role: .cancel) { }
}
Concurrency: Lean Into Async/Await
iOS 26 doesn’t deprecate Combine – but Apple’s direction is clear: async/await is the preferred concurrency model going forward [Ref-8]. If you have Combine pipelines handling network calls or state updates, now is a practical moment to migrate the critical paths to structured concurrency. We’ve covered migrating Combine pipelines to async/await in depth if you want to go further after this step.
One more thing worth mentioning here: swap print for Logger [Ref-9]. It’s a small change that pays off – Logger is faster, integrates directly with Instruments, and is the right tool for the job in modern iOS apps.
// ✅ Modern async/await - prefer this over Combine for new code
func fetchUser() async throws -> User {
    let (data, _) = try await URLSession.shared.data(from: url)
    return try JSONDecoder().decode(User.self, from: data)
}
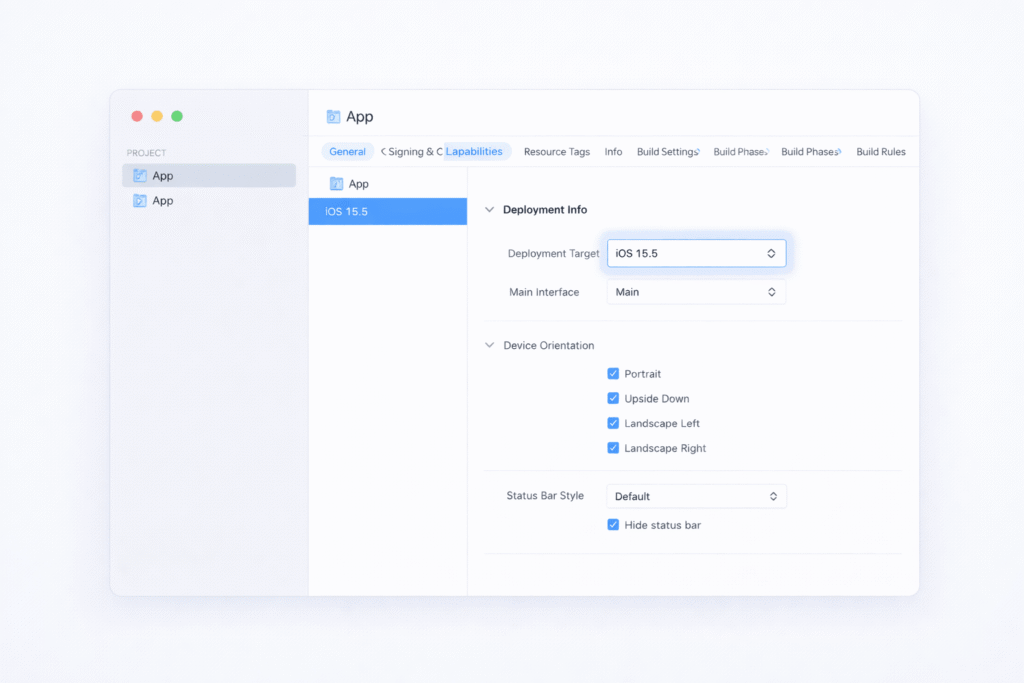
Step 3 – Update Your Minimum Deployment Target
Here’s something that surprises some developers: building with the iOS 26 SDK does not force you to raise your minimum deployment target. These are two separate settings. Users on older iOS versions can still run your app.
That said, this migration is a natural checkpoint to reassess. Pull up your analytics, look at which iOS versions actually have users, and consider dropping versions with near-zero adoption. Most teams are comfortable targeting iOS 16 or iOS 17 as a minimum today.
To update in Xcode: select your project → choose your target under TARGETS → set the version under General → Deployment Info.
One thing worth checking while you’re here: any APIs guarded by #available calls. If you raise the deployment target, some of those guards become dead code. Remove them – they add noise and slow down code review. It’s a small YAGNI win: don’t carry code for OS versions your app no longer supports.
Step 4 – Address Privacy and Permission Changes
Two important changes in this area for iOS 26.
First: TLS 1.3 is now the default, with quantum-safe encryption built in. If your app – or any third-party SDK you depend on – still relies on TLS 1.2, those network connections will fail silently. Audit your networking layer and check each dependency’s release notes before you archive.
Second: review your Privacy Manifest (PrivacyInfo.xcprivacy) [Ref-10]. If your app touches “required reason” APIs – UserDefaults, file timestamps, disk space – you must declare the approved reason codes [Ref-11]. Xcode 26 will surface missing entries during validation, but they’ll also fail App Store review. Don’t leave this until the last day.
Here’s what a complete set of common entries looks like:
<!-- PrivacyInfo.xcprivacy - required reason API entries -->
<key>NSPrivacyAccessedAPITypes</key>
<array>

    <!-- UserDefaults access -->
    <dict>
        <key>NSPrivacyAccessedAPIType</key>
        <string>NSPrivacyAccessedAPICategoryUserDefaults</string>
        <key>NSPrivacyAccessedAPITypeReasons</key>
        <array>
            <string>CA92.1</string> <!-- Access own app's defaults -->
        </array>
    </dict>

    <!-- File timestamp access -->
    <dict>
        <key>NSPrivacyAccessedAPIType</key>
        <string>NSPrivacyAccessedAPICategoryFileTimestamp</string>
        <key>NSPrivacyAccessedAPITypeReasons</key>
        <array>
            <string>C617.1</string> <!-- Access timestamps of files created by the app -->
        </array>
    </dict>

    <!-- Disk space access -->
    <dict>
        <key>NSPrivacyAccessedAPIType</key>
        <string>NSPrivacyAccessedAPICategoryDiskSpace</string>
        <key>NSPrivacyAccessedAPITypeReasons</key>
        <array>
            <string>85F4.1</string> <!-- Check disk space before writing to disk -->
        </array>
    </dict>

</array>
Step 5 – Handle Liquid Glass: Adopt or Opt Out
This step is unique to iOS 26 – and it’s the one that’ll affect every app visually, whether you’re ready or not.
When you rebuild with Xcode 26, standard UIKit and SwiftUI components automatically adopt the Liquid Glass look: translucent materials, dynamic blurs, and refined controls across navigation bars, tab bars, sheets, and buttons. For apps built primarily on standard system UI, this largely just works – and honestly, it looks great.
For apps with heavily customised UI, expect visual differences that need attention. Navigation bars and sheets render differently when Liquid Glass is active, and components that lay custom backgrounds on top of system views will need adjusting. It’s worth keeping the SwiftUI performance implications of Liquid Glass in mind as you adopt it – particularly around view updates and layer composition.
If you need more time to prepare, Apple provides a temporary opt-out you can add to Info.plist:
<!-- Info.plist - preserve iOS 18 visual style on iOS 26 -->
<key>UIDesignRequiresCompatibility</key>
<true/>
This preserves the iOS 18 visual appearance when running on iOS 26. Use it as a bridge – Apple has confirmed this key will be removed in a future major release, so it buys time, not a permanent escape.
If you’re ready to embrace Liquid Glass, SwiftUI’s new .glassEffect() modifier is the entry point:
// SwiftUI - applying Liquid Glass to a custom view
struct FeaturedCard: View {
    var body: some View {
        Text("Featured")
            .padding()
            .glassEffect()
    }
}

// UIKit - glass effect on a custom view
let glassEffect = UIGlassEffect()
let effectView = UIVisualEffectView(effect: glassEffect)
effectView.frame = CGRect(x: 0, y: 0, width: 200, height: 50)
view.addSubview(effectView)
Real-world scenario: If your app draws custom backgrounds on navigation bars or sheets, those backgrounds will block the Liquid Glass rendering pipeline. The fix is to remove the custom backgrounds and let the system material take over. Test every major screen in the iOS 26 simulator before shipping – visual regressions here are the most common surprise in this migration.
Step 6 – Test on the iOS 26 Simulator
I can’t stress this enough: don’t skip testing. Build warnings will catch deprecated APIs – but they won’t catch visual regressions from Liquid Glass, layout shifts, or networking failures from the TLS change. Only hands-on testing will.
Here’s where to focus your regression pass:
- Navigation and tab bar – check for layout shifts under Liquid Glass
- Sheets and popovers – rendering changed significantly in iOS 26
- Custom UI components – standard controls update automatically; custom ones don’t
- Networking – verify TLS 1.3 compatibility across all endpoints and third-party SDKs
- Permissions – test each permission flow end-to-end on a clean iOS 26 install
One tip: use Xcode’s build warnings as a companion guide during this phase. Each warning links directly to Apple’s replacement documentation – it’s a surprisingly efficient way to navigate the deprecation list. And if you hit confusing layout issues during your SwiftUI regression pass, the techniques in debugging visual regressions in SwiftUI will save you a lot of time.
Step 7 – Validate and Submit to App Store Connect
Testing is done. Time to archive and submit.
- Set your scheme to Any iOS Device (arm64)
- Go to Product → Archive
- In Organizer, click Validate App and resolve any errors before proceeding
- Click Distribute App → App Store Connect
A few validation blockers to watch for at this stage:
- Missing Privacy Manifest entries – cross-check your
PrivacyInfo.xcprivacyagainst Apple’s required reasons list [Ref-11] - Bitcode references – Bitcode is fully removed in Xcode 26; clean up any lingering project or build settings references
- Third-party SDK incompatibility – if a dependency hasn’t released an iOS 26-compatible version, its binary may fail validation. Check each vendor’s release notes before archiving.
Tip: Submit at least a week before April 28. App Store review typically takes 24–48 hours, but edge cases happen. Don’t put yourself in a position where a review delay causes a missed deadline.
Bonus – Helpful Tools and Resources
A few resources that have genuinely saved me time in past migrations:
- Xcode’s Migration Assistant – when you first open your project in Xcode 26, it offers automated fixes for some deprecated APIs. Accept what makes sense and review the rest manually – it’s a good starting point, not a complete solution.
- Apple’s API diff pages – bookmark these before you start. They list every added, deprecated, and removed API between SDK versions. I learned to check these at the beginning of each major migration – they give you the full picture before you ever open Xcode, and that context makes every subsequent step faster.
- WWDC 2025 sessions – Session 219 “Meet Liquid Glass” [Ref-12], Session 284 “Build a UIKit app with the new design” [Ref-13], and Session 323 “Build a SwiftUI app with the new design” [Ref-14] cover the most impactful changes in this migration. If your app uses 3D rendering, Session 288 “Bring your SceneKit project to RealityKit” [Ref-3] is essential viewing.
- Swift Forums and Apple Developer Forums – there are already active threads on iOS 26 migration issues. If you run into a weird edge case, chances are someone else already has a thread on it.
Wrapping Up
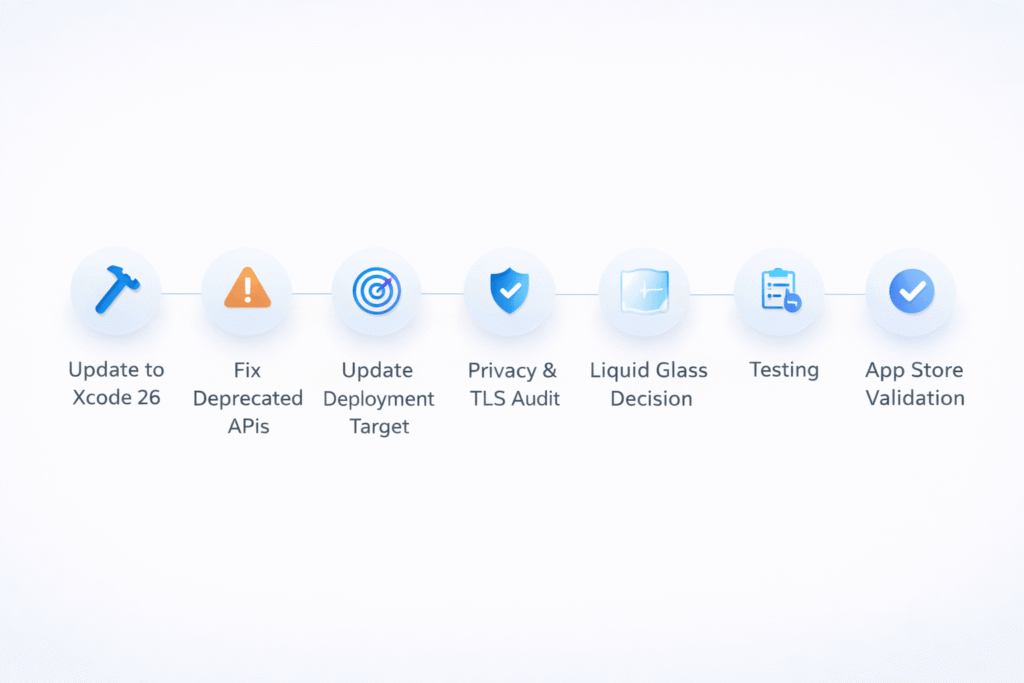
The April 28 deadline is firm – and with it comes one of the most significant iOS SDK migrations in recent memory. But it’s absolutely manageable when you work through it step by step:
- Update to Xcode 26
- Fix deprecated APIs – UIKit and SwiftUI
- Evaluate and update your minimum deployment target
- Audit Privacy Manifest entries and TLS compatibility
- Decide your Liquid Glass strategy – adopt it now or use the temporary opt-out
- Test thoroughly on the iOS 26 simulator
- Validate and submit with time to spare
Most apps will get through this in a few focused days of work. Legacy UIKit apps with heavy customisation and many third-party dependencies will take longer. That’s expected. Start early, work methodically, and don’t leave it to the final week.
Ship before the deadline. And once you’re compliant – take a real look at what iOS 26 has to offer. The Foundation Models framework opens up on-device AI features that simply weren’t possible before. The migration is the entry fee. What’s on the other side is worth it.
References
[Ref-1] Apple Developer News – Upcoming App Store submission requirements
[Ref-2] Apple Developer Documentation – Replacing UIWebView in your app
[Ref-3] WWDC25 Session 288 – Bring your SceneKit project to RealityKit
[Ref-4] Apple Developer Documentation – RealityKit
[Ref-5] Apple Developer Documentation – WKWebView
[Ref-6] Apple Developer Documentation – Migrating to new navigation types
[Ref-7] Apple Developer Documentation – NavigationStack
[Ref-8] Apple Developer Documentation – Updating an App to Use Swift Concurrency
[Ref-9] Apple Developer Documentation – Logger
[Ref-10] Apple Developer Documentation – Privacy manifest files
[Ref-11] Apple Developer Documentation – TN3183: Adding required reason API entries to your privacy manifest
[Ref-12] WWDC25 Session 219 – Meet Liquid Glass
[Ref-13] WWDC25 Session 284 – Build a UIKit app with the new design
[Ref-14] WWDC25 Session 323 – Build a SwiftUI app with the new design
